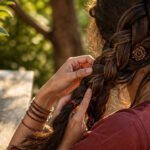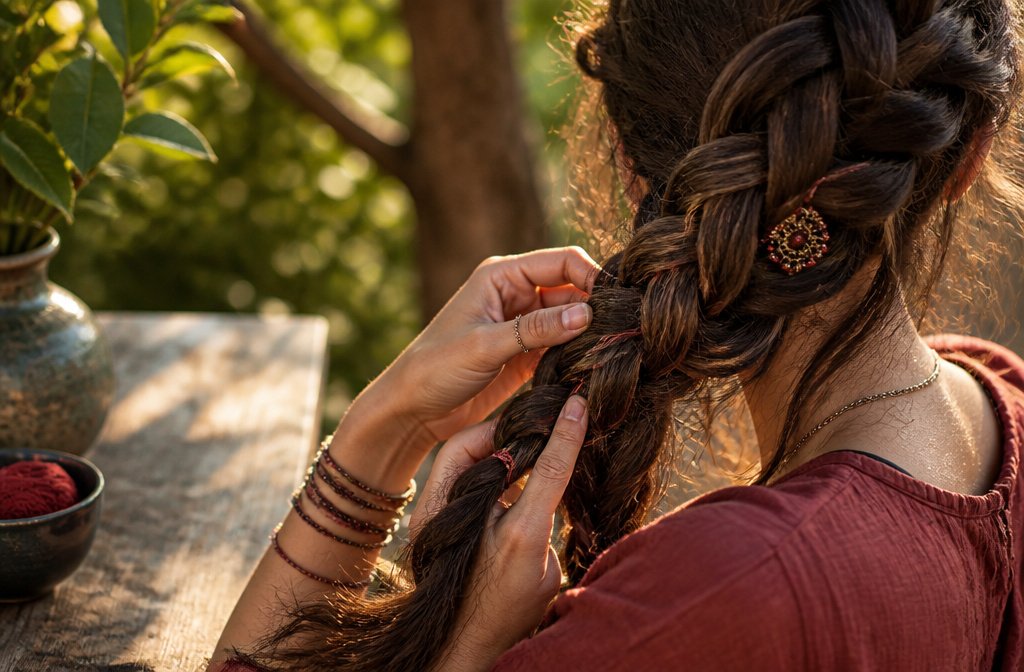
The trick is matching the braid to your actual texture and time, not your mood. A loop braid holds without elastics on fine hair that slips out of everything else, while a big side braid needs pancaking after, not stuffing extra hair in at the start. The waterfall braid drops strands each pass; the interwoven 3-strand mixes three finished braids into a fourth. Some need ten minutes and a mirror, others need a second pair of hands to keep tension even while you pin. You already know whether you are braiding for office air conditioning or a summer festival crowd. That decides which of these is yours.
1. Side Braid Bun

A side braid bun asks for medium to long hair and about ten minutes of mirror time. The braid starts at one temple, follows the hairline or sits just behind the ear, then wraps into a low or mid bun at the nape. Everything stays off the neck, which is why it works in summer heat, but the shape stays polished enough for an office that stretches into dinner without a change.
What separates this from a full braided bun is the single braid on one side. The other side stays smooth or gets lightly twisted back, so the profile stays asymmetrical and intentional rather than half-finished. Accessories shift it: a small clip where the braid meets the bun reads formal, while a colored ribbon threaded through the braid turns it casual for a weekend. I have seen this styled with the bun seated low and tight for a wedding, or messier and higher for a pulled-together errand day. The same braid, two registers, depending on how you anchor the twist.
2. Upside Down French Braid Bun

The upside down French braid bun starts at the nape and travels upward, gathering into a bun at the crown. Gravity works with you instead of against you here, and the finished shape stays neat through a full day of wear.
Braiding behind your own head takes practice. The first few tries will likely feel messy, since you are upside down and cannot see what your hands are doing. A smoothing crème helps keep sections from slipping if your hair is prone to that, and smoother hair weaves much more easily with a serum worked through first.
Once the plait reaches the crown, coil it into a bun and secure. A touch of hairspray keeps everything neatly in place. Tuck in a fresh flower if you want something summery, though the style stands on its own without it.
3. Side French Braid Bun

A French braid worked along the hairline from one temple, then pinned into a side-set bun, frames the face asymmetrically. The softness comes from the off-center placement, which keeps the style from reading too severe or ballerina-tight. You can wear the braid itself sleek or slightly pulled for width, depending on how much coverage you want along the hairline.
The second pair of hands matters here more than with a standard bun. Someone holding the tail while you pin keeps the tension even and the braid from loosening as you work it into the coil. For a date or a wine-tasting afternoon, this reads chic without trying hard; for a wedding, the same structure holds up under accessories. All the hair stays up, which is practical in summer heat, and the side placement means you are not locked into a center-part look that fights your face shape.
4. Swedish Crown Braid

Two braids wrapped around the head like a halo and pinned to meet at the back create what stylists call the Swedish crown braid. The name refers to placement, not technique, which means you can build it with a Dutch braid, a standard three-strand, or whatever your hands already know.
Summer heat is where this style earns its keep. Hair stays entirely off the neck and face, and the weight distributes evenly instead of pulling at one spot like a ponytail. Thick hair especially benefits; you get the lift and air circulation without the tension headache that comes from piling everything into a single elastic.
Most textures cooperate if the length reaches at least the collarbone. Shorter layers need pinning to stay put, and very fine hair may require texturizing spray beforehand so the braid has something to grip. The real variable is whether your hair holds a curve around the head or fights it. Mine tends to slip at the nape, so I start the braid slightly higher than the hairline and use small clear elastics at the ends before tucking them under.
5. Loop Braid
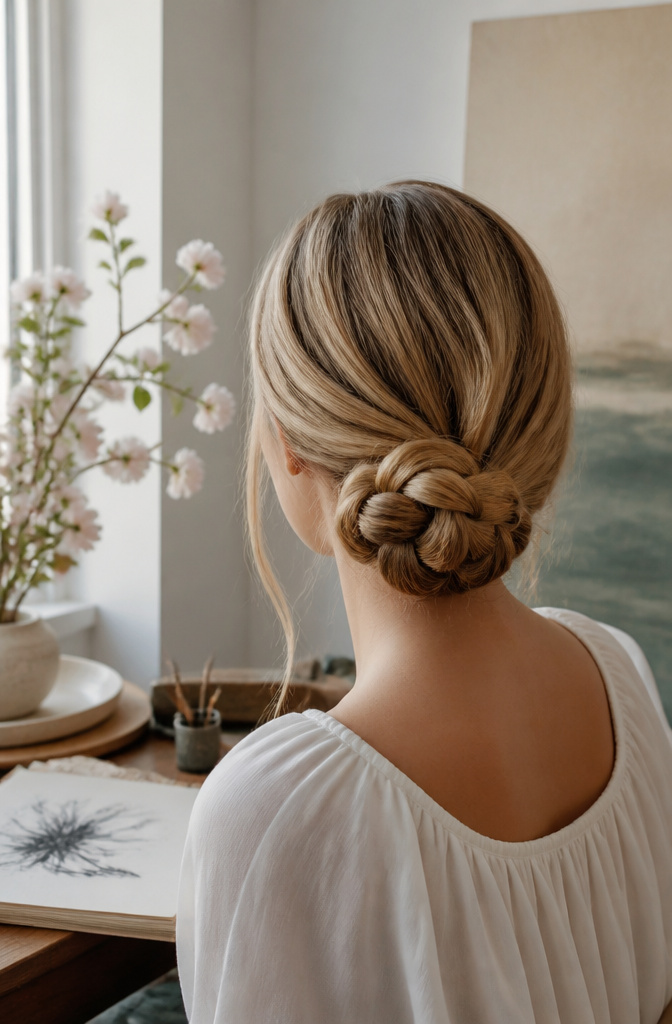
A loop braid pinned through its own center stays put without any elastic at the end, which is the first thing that sold me on trying it. You braid normally, then curve the tail back toward the scalp so the braid forms an oval or circle, and secure it with pins pushed through the loop itself rather than across the top. The tension of the braid against the pin keeps everything locked in place, even on fine hair that slips out of most updos.
The shape reads as intentional and sculptural, not like a braid that came loose. I find it works best when the loop sits low at the nape or slightly off-center, since a perfectly symmetrical circle on top of the head can look costume-y. For a 25-minute style that uses no product and no heat, it photographs better than it has any right to.
6. Big Side Braid

A big side braid gets its volume from what you do after the braid is finished, not from cramming in extra hair at the start. The technique is called pancaking, and it works on any standard three-strand braid: once you reach the end and secure it, you gently tug each loop outward with your fingertips. Small pulls matter more than large ones. If you yank too hard, the braid loosens and the elastic slips. Hair texture changes how much the loops hold; fine hair usually needs a light mist of dry shampoo beforehand so the strands grip instead of sliding flat.
Pulling everything to one side gives the braid its shape. I part my hair deep on the opposite side so the bulk sweeps across the crown and falls over my shoulder, which keeps the front from looking too empty. The braid itself sits at the nape or just behind the ear, never centered. For staying power, I cross the elastic a second time through only half the tail, which tightens the hold without a visible knot.
7. DIY Messy Fishtail Braid

A messy fishtail braid works best on hair that has some texture, which is why second-day hair makes this so much easier than a fresh blowout. The natural oils and slight grit give the strands something to hold onto, so the braid does not slide apart before you even finish.
Start the braid lower down, near the nape or wherever your hair falls past the shoulders, rather than pulling everything tight from the crown. The whole point of this style is that imperfection looks intentional. Once the braid is secured, use your fingers to pull out random sections. A little looseness gives you that bohemian, spontaneous shape; pull more if you want a wider, more dramatic braid. Thin hair and thicker hair both handle this well, since the technique is forgiving either way.
What keeps it from looking actually messy is the condition of your ends. If they are dry or split, the texture reads as damage rather than style. A deep conditioning treatment beforehand keeps the surface smooth enough that the pulled strands catch light the right way.
8. Waterfall Braid

A waterfall braid works best when the hair underneath has real movement. The top strand drops into the loose hair below while a new section takes its place, and that exchange keeps repeating across the head. The result looks intricate but stays light, almost like hair jewelry that happens to be made of hair itself.
Patience matters more than skill here. Each dropped strand has to fall cleanly, or the cascade tangles into a dense rope rather than the open, airy effect the style promises. Festival crowds love this one for exactly that reason: it photographs like a full updo from the front but keeps the length free down the back.
Fine hair needs help carrying it off. A volumising blow-dry spray at the crown gives the braid something to grip, and hot rollers add lift if the spray alone falls flat. Just protect first; heat damage shows up fast in hair that thin.
9. Interwoven 3-Strand Braid

Three separate braids, each finished before the weaving starts, give this style its structure. The technique is simple in principle and easy to muddle in practice: you braid three standard three-strand sections, then lace them together as if they were single strands of a fourth, larger braid. What convinced me, watching half a dozen tutorials before I tried it on a friend with waist-length hair, is that the individual braids must be pulled slightly loose before interlacing. Too tight, and the outer two refuse to cross over the center one without bulging or slipping.
Medium thickness works best for each component braid; pencil-thin ones disappear into the larger shape, and thick ones fight each other at the crossover points. The finished result holds well for a full day, though the bottom few inches tend to loosen where the three tails meet. A small clear elastic at that junction, hidden underneath, solves the problem without showing.
10. Rope Braid Updo

A rope braid updo looks complicated but comes down to two simple twists coiled together. The trick is in the direction. Each section needs to twist the same way, both clockwise or both counterclockwise, so the strands wrap around each other cleanly. When you coil them into a bun, you reverse that direction. The twist goes one way, the wrap goes the opposite, and the tension holds itself without a hundred pins.
Hair texture changes the result more than length does. Fine hair slips out of the twist unless it has some grip from day-two oil or a light texturizing spray. Coarser hair grips itself naturally and the rope stays tighter, though the weight can pull the updo lower by afternoon. Both sections must match in twist direction; mismatched ropes unravel against each other and the whole thing collapses before you leave the bathroom.
I pin the first coil at the nape, then wrap the second around it and anchor where the two cross. Two sections, same twist, opposite wrap, done.
11. Braided French Twist
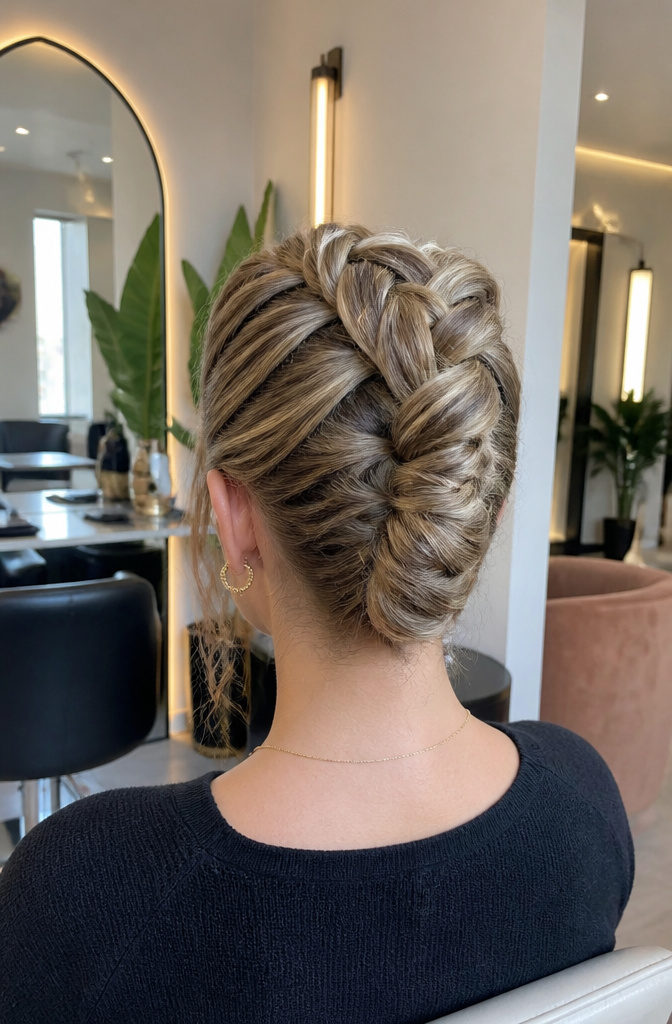
A braided French twist builds texture straight into the roll itself rather than pinning a braid on top afterward. The braid replaces the usual smooth sweep of hair, giving the style something to grip.
Fine hair tends to slide right out of a classic French twist; the braid creates ridges that bobby pins can actually catch. I start with a standard French braid at the crown, continuing down toward the nape, then coil the remaining length into the vertical roll. The braid disappears into the twist or sits partially exposed along one edge, depending on how much detail you want visible.
For the neatest result, braid with slightly damp hair or a light texturizing spray. Too much product makes the sections slippery and harder to control. The braid itself should be snug but not tight; tension that pulls at the scalp will loosen within an hour as your head moves.
This style reads formal enough for a wedding but stays secure enough for a full workday. The real advantage is how little hair you actually need; shoulder-length strands work fine, since the braid compresses volume rather than requiring excess length to wrap.
12. Tucked Braided Bun

A tucked braided bun hides every end. The braid itself is worked, pinned flat against the head, then the tail is folded back on itself and threaded underneath so the coil looks like it grew that way. The tuck point matters most: a pin driven from inside the bun catches the folded-under tail against the scalp, and because the fastener never breaks the surface, the silhouette stays clean from every angle.
Fine hair sometimes slips at the fold. What fixes it is braiding slightly damp, which gives the section more grip without product buildup that would show in the finished shape. A small hook pin, slid in from the underside where the bun meets the head, holds better than a straight pin pushed through the crown.
This style reads as formal because of that seamless finish, but the structure is sturdy enough for an ordinary day. The hidden work is the whole point.
13. Simple Braided Chignon

A simple braided chignon sits right where a wrapped bun would, only the braid gives it a backbone that holds through a ten-hour day. The plait at the nape keeps fine hair from slipping, and on thick hair it tames bulk without looking like you tried too hard. What separates it from a tight bun is the slight give where the braid meets the head; what separates it from a loose chignon is that structure.
I watched a stylist build this once for a wedding, and the braid was the insurance policy. She wove a standard three-strand low, coiled it counterclockwise, and pinned through the loops rather than over them. The result looked softer than a ballerina bun but stayed put through dancing.
For an everyday version, a side part and slightly pulled braid loops flatter most face shapes. If your hair layers stick out, a touch of water on your palms before you start smooths them in without product buildup.
14. French Braid Ponytail

A French braid that feeds straight into a low or mid-height ponytail keeps every strand locked down through a humid commute or a morning workout. The braid takes the tension off your edges, which matters if you’re pulling your hair up regularly, and the ponytail handles the rest. I start mine closer to the top when my hair is shorter; you need that extra room to work with before the braid runs out of length. Smoothing crème helps if your layers tend to slip out of the sections, and a drop of serum on the tail keeps the ponytail from frizzing once the braid ends. Hairspray at the finish holds the transition point neat, though on second-day hair I skip it and let the texture grip the elastic instead. The look reads professional enough for a 9 a.m. meeting and stays fun for after-work drinks, which is the combination that earns it a spot in my rotation when I’m short on time but want something intentional.
15. Simple Knot Braid

A knot braid builds the style by looping one section over another and pulling it tight, which means slippery hair that refuses a standard three-strand braid actually cooperates here. The knot structure sits looser than a crossed braid, so the finished look has that relaxed, slightly undone quality that reads as intentional rather than sloppy.
The technique works best when you start with dry, detangled hair and keep your sections on the smaller side. Larger knots bulk up fast and can pull at the scalp, while smaller ones settle in with more even tension. I watched enough tutorials where the person demonstrating had clearly practiced on textured hair first, and the difference showed in how cleanly they could cinch each knot without the whole thing sliding apart.
For holding power, a lightweight texturizing spray applied before you start gives the knots something to grip. Skip anything too heavy; product buildup turns the looped sections greasy by midday and the looseness that makes this style pretty becomes limp instead.
16. Ribbon Halo Braid

A ribbon halo braid works because the ribbon does structural work instead of sitting on top like an accessory. The technique weaves a narrow satin or grosgrain strip through one of the three strands as you braid, so the ribbon becomes part of the braid itself rather than laced through afterward. Where the braid curves around the crown, the ribbon catches light at the turns and reads as a deliberate highlight against the hair.
The placement matters more than the ribbon width. A half-inch ribbon gets lost in dark hair; one inch starts to fight the braid tension. The ribbon should match the strand thickness as closely as possible so the braid stays even and the scalp line stays clean. I have seen this done with the ribbon threaded through only the outermost strand, which leaves the inner two in plain hair and creates a stripe effect on the visible side of the halo.
This style holds up best when the braid starts at one temple and runs all the way around rather than meeting at the back. A continuous circle means the ribbon turns once at each temple and once at the nape, giving three visible moments instead of one messy join. Fine hair needs texturizing spray at the root or the braid slips and the ribbon gaps. Thick hair takes the ribbon well but requires a longer length to complete the full crown without pulling.
17. Low Twisted Bun with Braid Accent

A low twisted bun reads as polished from every angle, but the small braid wrapping its base is what keeps it from looking like something you threw together in traffic. The trick lies in where that braid comes from. Pull it from the underside of your sectioned hair, right at the nape, so the main twisted mass stays full and sculptural up top. Thin braids work better here than thick ones; anything too heavy competes with the bun instead of framing it.
Half-inch sections from the underlayer give you enough braid to wrap without robbing volume. Secure the wrap with a pin pushed through the braid and into the bun’s core, not just the surface, or it loosens by midday. This style holds from a morning meeting straight through dinner because the tension distributes across the twist rather than pulling at your hairline. If your layers are shorter, leave a few face-framing pieces out before you start the twist; they soften the line without unraveling the structure.
18. Double Dutch Braid

The Dutch braid technique crosses strands under rather than over, which pushes the braid outward so it sits raised on the scalp instead of lying flat. Two of these, one along each side of the head, give the classic double Dutch look that works for errands or for keeping hair tidy under a helmet. You can leave them hanging or pin them together at the nape for a single, cleaner line.
Hair shorter than shoulder length still holds this style better than a standard French plait, since the under-crossing creates a more defined ridge that shows even when the starting section is small. The first few tries feel awkward, especially if your fingers are used to the over-motion of a regular three-strand braid. Crossing under while also grabbing new hair from the side takes coordination, but the muscle memory builds fast with repetition.
19. Double Twist Fish Tail Long Hair Braid

Fishtail braids look intricate but divide into two simple strands per section, which is why they hold up well for twisting. The move that makes this style work happens after both braids are finished, not during. You braid two separate fishtails, secure each with a clear elastic, then wrap them around each other like a rope from the nape down. Hair past the shoulder blades gives you enough length for the twist to show properly; shorter layers unravel at the ends and the whole effect looks accidental rather than intentional.
The twist itself should stay loose. Pull it too tight and the braids flatten against each other, losing the definition that makes fishtails interesting in the first place. A light texturizing spray on finished braids before twisting helps the sections grip without going stiff. I have found that pinning the twist at two points, top and bottom, keeps it from loosening through the day better than one central pin ever does.
20. Long Hair Side Braid

Long hair carries its own anchor. A side braid worked along one shoulder stays put through most of a day because the weight of the hair itself does the holding, not a wall of pins digging at your scalp.
I start this one on the heavier side, right at the temple or just behind the ear, and braid outward along the jawline rather than pulling backward toward the neck. The result sits in front of the shoulder, visible from the face, which is the whole point of wearing it to the side. Three or four pins at the start are usually enough because the rest of the length drapes naturally; the braid tightens slightly under its own pull as you move.
The texture matters more than the pattern. A standard three-strand braid shows the cleanest line on long hair, while a fishtail or rope braid tends to loosen and sag where the weight concentrates. If your hair is fine or freshly washed, a quick pass with dry shampoo at the roots before you start adds the grip that keeps the beginning from slipping.
This style reads deliberate without reading complicated. It works for the same occasions a ponytail would, but the side placement does more with your outfit’s neckline and keeps the focus near your face.
21. Cross Long Hair Braid

Two braids crossed at the back of the head give a simple structure that reads as intentional rather than lazy. Each braid starts from a different side, travels across, and gets pinned where they meet. The crossing point can sit high, near the crown, or drop lower toward the nape, and that one choice changes the whole mood of the style.
High placement pulls the eye upward and works well when you want the back of the head to look sculptured. Low placement feels more relaxed and sits cleaner against collars or jacket backs. In either position, the pins need to grip both braids at once; a single pin through the X where they cross does the holding, though a second one angled underneath prevents sagging if your hair is heavy or the day runs long.
The braids themselves can be simple three-strand or rope twists, depending on what texture you want against the rest of your hair. What makes this style useful is how it contains long hair without requiring a bun or ponytail, so you get the length without the tangle.
22. Ponytail Long Hair Braid

A ponytail with the full length braided is the first thing I reach for when my hair needs to stay put through a workout or a packed Saturday of errands. The style takes every strand off your neck and keeps it there, which matters more than it looks when you’re chasing a bus or a toddler.
You can braid the ponytail as one thick rope, or split it into two or three smaller braids emerging from the same base. The single braid is faster and holds longer; multiple braids give more texture and work better if your layers tend to slip out. Either way, the braid starts at the elastic, not the crown, so there is no tension on your edges while you move.
For very long hair, this is the simplest control method that still looks intentional. A smooth ponytail base with a braided tail reads polished enough for video calls, but the real payoff is mechanical: nothing swings, nothing tangles, and you are not adjusting it every fifteen minutes. I have worn this under a bike helmet, through a full yoga class, and to the grocery store in the same day, and it held up for all three without a redo.
The only judgment call is the elastic. A coated band at the base prevents the braid from loosening, and a second clear elastic at the tip keeps the end neat. Skip the second, and the braid frays into a wispy tail that looks accidental rather than relaxed.
23. Criss-Cross Goddess Braids
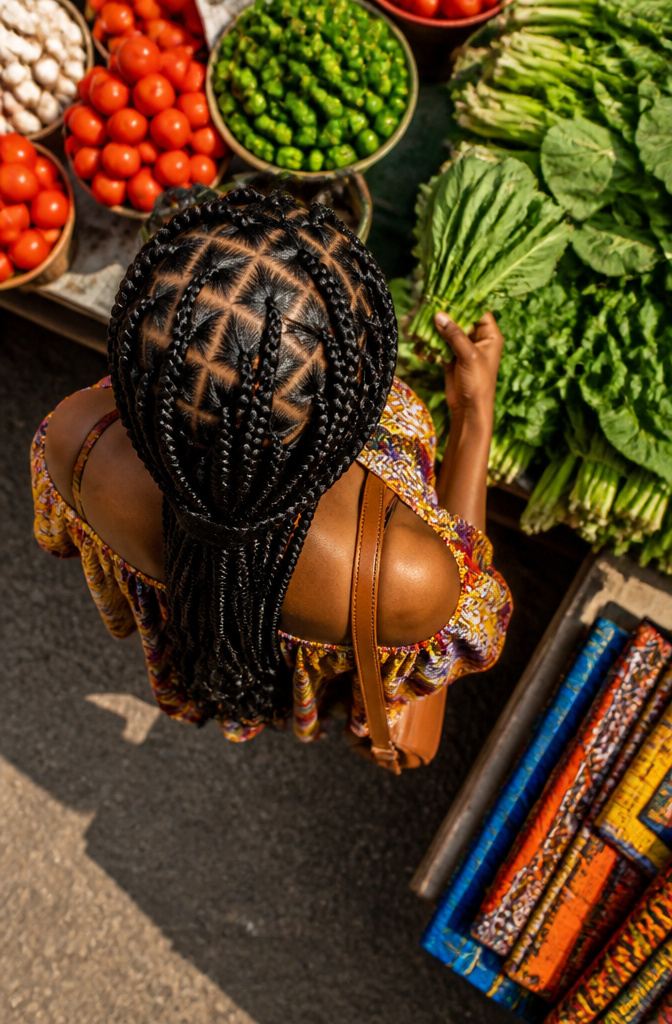
The criss-cross pattern on these goddess braids is mapped onto the scalp before any extension hair gets added, which is what keeps the lines clean when the sections meet and overlap. You will need braiding hair for the thickness and length most people want here, and the amount scales with how many braids you plan to wear. One to three braids can be done with a single pack of X-Pression or two packs of standard braiding hair; four braids or more pushes that to three packs. Pre-bundled packs made for goddess braid styles remove the guesswork entirely if you would rather not calculate.
These are fundamentally large cornrows, so they carry the same protective benefits and the same need for regular scalp moisture. The vacation or busy-week appeal makes sense once you have spent the moderate install time, though removal takes its own afternoon and should be factored into the schedule.
24. Dynamic Side-Swept Cornrows

Side-swept cornrows angle across the scalp instead of running straight back, and that single change does more for framing the face than most people expect. The diagonal pull draws the eye upward and outward, which softens a strong jawline or balances a wider forehead without the harsh symmetry of a center part. You can part the hair or skip one entirely; the braid itself becomes the architecture.
What sold me on the style was seeing how the alternating sizes of each plait create rhythm. Thicker cornrows at the temple tapering to finer ones at the nape keep the silhouette light, while neat baby hairs along the hairline make the finish look intentional rather than rushed. The angle matters more than the size — too shallow and it reads as off-center cornrows, too steep and the tension stresses the edges.
Color and accessories shift the mood without redoing the base. Pops of color woven through, or beads and gold cusps threaded at the ends, turn a protective style into something that reads as deliberate fashion rather than mere convenience. The style protects against heat damage, which matters if you are trying to grow out length or recover from over-processing, but only if the scalp stays moisturized underneath. Dryness under tension is how breakage happens.
25. Asymmetrical Feed-Ins

Asymmetrical feed-ins work best when the contrast is sharp enough to read from across a room, not so subtle that it looks like a spacing mistake. One side packed with small braids and the other carrying two or three chunky ones gives the shape its punch. The source images that stuck with me paired that size flip with staggered starting points. Some braids launch right at the hairline while others begin an inch or two back, so the scalp pattern itself tilts diagonally rather than sitting in neat rows.
Gold cuffs or beads at the ends of the thicker braids help anchor the eye on the heavier side, which keeps the whole style from feeling lopsided. I have seen this done with the small-braid side swept behind the ear and the big-braid side falling forward, and the reverse works too. What matters is committing to the imbalance rather than trying to even it out halfway through. If your natural part already favors one side, start the extra braids there and let the lighter side balance against it.
26. Braided Cornrow Updo

Cornrows braided toward the crown give the updo its actual structure, not just its texture. The direction matters: rows sweeping from the temples to the center back build a natural lift at the front, while rows running straight back flatten the silhouette. I have seen stylists at @borabraids pin the gathered ends into a large bun and add hair cuffs, which turns a practical protective style into something that reads dressed-up without extra heat or daily manipulation.
The upkeep is minimal once the braids are in, though the scalp still needs regular hydration. What convinced me, comparing dozens of finished looks, is how the varied sizing of the cornrows themselves becomes part of the design. Thicker rows at the nape tapering to finer ones at the hairline create a wrapped-knot effect that looks intentional rather than merely gathered. The placement of each row determines the final shape of the updo, so the braid pattern is worth mapping before anyone starts parting.
27. Ombre Feed-In Cornrows

Feed-in braids solve the bulk problem that plagues traditional cornrows. The extensions are added gradually as each braid progresses, so the base stays flat against your scalp instead of flaring out at the hairline. That same technique is what makes ombre color transitions readable rather than muddled. A dark brown or black root melts into honey or platinum ends because the braider introduces the lighter weft incrementally, one pinch at a time.
The tension question matters more than the color story. Done too tight, any cornrow pulls at the edges; done right, the feed-in method actually lightens the load on your hairline because the weight distributes across more of your braid rather than concentrating at the root. It is still a protective style, not a magic shield. I would not leave these in past six to eight weeks, and I would not let anyone braid so firmly that your temples throb.
Blonde ombre on dark roots reads as the obvious choice, but the real advantage is structural. The color shift emphasizes the architecture of each braid, turning a flat row into something that catches light differently at every angle. Gold cuffs or small beads at the ends add a point of focus without competing with the gradient.
28. Varied-Sized Braided Ponytail

A ponytail built from braids of different widths side by side gives you texture without reaching for pins, cuffs, or wrap bands. The contrast does the visual work: one or two thick, almost rope-sized braids sit against a field of smaller, tighter ones, so the tail reads as dimensional from across a room.
The placement matters more than the count. Cluster the larger braids toward the crown where they catch light, or offset them to one side so the ponytail falls with deliberate weight rather than uniform bulk. The small braids fill gaps and keep the silhouette clean.
This is where the sources split on approach. One route keeps the large braids as the main event, using small cornrows as the supporting structure that pulls everything back. The other reverses the ratio, letting a single thin braid run through wider loops for balance. Either works, but the first reads bolder and the second reads more casual. For women building a wardrobe that has to carry from morning meetings to evening pickup, that distinction is worth deciding before you sit down in the chair.
29. Braided Detail Bun Updo

A braided detail bun builds its texture before the bun ever takes shape, with small plaits laid flat against the scalp or worked through a sectioned ponytail so they read as pattern rather than border. The first time I mapped this out, I treated the braids as an afterthought and pinned them around a finished bun; they slipped within the hour and looked like a hastily added belt. Now I section the hair while it is still down, braid a lattice or a few diagonal rows across the crown or sides, and gather everything at the nape or crown so the plaits disappear into the twist and reappear where the bun spreads. Fine hair benefits from a tiny bit of dry texture at the roots so the braids do not slide, and the bun itself stays cleaner if you form it from a ponytail wrapped around a small elastic rather than twisting free sections. The finished shape reads as sculptural from across a room and holds up through a full workday.
30. Frohawk with Flat Twisted Sides

A frohawk with flat twisted sides builds its shape from what you already have on your head, no clippers required. The center strip stays loose and full, giving that mohawk crest, while the hair on either side gets worked down in flat twists that hug the scalp tight. What convinced me, reading through a dozen tutorials, is how much the result depends on tension: twists pulled too loose sag by midday, too tight and the scalp shows strain at the hairline.
The silhouette reads bold from straight on but stays practical underneath. Flat twists lie flatter than cornrows, so scarves and hats still fit without distorting the pattern. For someone growing out a tapered cut or protective styling between salon visits, this bridges the gap without starting over. Volume at the crown needs some help, usually from a pick or light stretching on blown-out hair, since shrunken texture disappears into the twist line.
Upkeep runs about a week before fuzz creeps in at the twisted edges. A silk wrap at night preserves the scalp work longer than the center fluff, which is easy enough to re-shape each morning.
31. Stitch Braids into Low Bun

The stitch pattern in trendy braided hairstyles ideas like this one comes from parting horizontal sections before you braid vertically. Each clean line sits visible between the braids, almost like rows of thread on fabric, which is where the name starts to make sense.
I watched a stylist work this out once and the parting took longer than the braiding itself. She used a rat-tail comb to mark horizontal bands across the scalp, then braided each vertical section from root to end, keeping tension even so those lines stayed crisp. Loose tension ruins the grid effect and the whole style goes muddy.
For the low bun, she gathered everything at the nape rather than pulling high. A low placement keeps the stitch pattern visible in front and turns the bun into an accent instead of the main event. The bun itself does not need to be neat. In fact, a slightly relaxed bun balances the precision of the stitches so the overall read is intentional, not rigid.
This style eats time on the front end. Plan for two to three hours in the chair if your hair is thick or long, and budget for a stylist who actually specializes in stitch braids. Someone who only does basic cornrows will rush the parting and you’ll lose the whole point.
32. Box Braids and Cornrows Mohawk
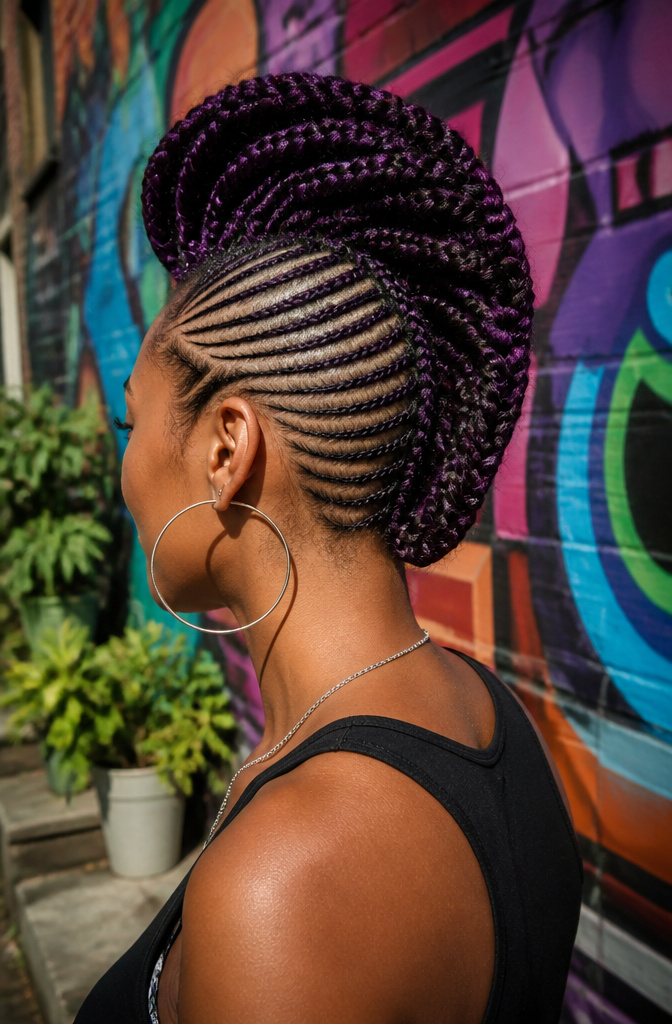
The contrast between tight cornrows along the temples and fuller box braids running down the center is what gives this style its architectural shape. Cornrows lie flat against the scalp and draw the eye upward, while box braids add volume and weight to the mohawk strip; reversing the placement flips the whole effect. What convinced me, studying reference after reference, is how much the part width matters: a narrow center strip reads delicate, almost regency-era, but widen it past two inches and the look shifts toward punk territory.
Keeping the braids in different sizes, not uniform, keeps the two textures from competing. Small cornrows against medium or jumbo box braids let each technique read as itself. The style works on hair with enough length for the center braids to hang or be gathered; without that length, the mohawk collapses into a puff rather than a ridge. Daily upkeep is minimal, though the scalp between cornrows dries faster and benefits from light oiling at the roots.
33. Two-Strand Twist Half-Updo

Two-strand twists pulled to the crown and pinned, with the lower hair left loose, give you the structure of an updo without sacrificing length or movement. The style reads as intentional rather than lazy, which matters on days when a full braid feels like too much effort but a ponytail feels too plain.
You can scale the twists to suit your hair density and your patience. Smaller twists, maybe a dozen or more, create a textured crown that looks almost woven from a distance and holds pins more securely if your hair is fine or layered. Fewer and larger twists, perhaps three to five per side, work faster and read more minimalist; they also leave less tension at the root, which some women find more comfortable for all-day wear.
The pinning is where most attempts go wrong. Twists loosen as you secure them, so you need to pin while the tension is still tight, sliding the bobby pin through the twist itself rather than just over it. If the ends of your twists are blunt rather than tapered, they may poke out; wrapping the last half-inch around the pin before you close it helps them lie flat against the scalp.
For the loose section, a soft wave or a straight finish both work, but the contrast matters more than the choice. Ultra-smooth ends against a textured crown feel polished; matched texture throughout reads more casual. Either way, the style transitions from a morning meeting to evening drinks without requiring touch-ups beyond maybe a single pin that worked itself loose.
34. High Ponytail with Chunky Braids

A high ponytail with chunky braids works best when the sectioning does the heavy lifting. Three to four thick plaits, each gathered from a generous wedge of hair, give that deliberate, sculptural weight without needing any special braid technique.
I learned the hard way that skinny braids read as busy and casual, while a few fat ones look intentional from across a room. The pony itself should sit at the crown or just above, pulled snug so the weight doesn’t sag by noon. A small, clear elastic at the base of each braid keeps the sections neat without adding bulk where you gather them.
This style holds surprisingly well for second-day hair, since the natural oils give the braids grip and the chunkiness hides any flatness at the roots. Fine hair benefits from a light texturizing spray before you start; without it, the braids can look wispy rather than bold.
35. S-Shape Jumbo Braids

S-curve jumbo braids follow a parting pattern that snakes across the scalp in a continuous wave, with each large braid tracing the exact line of the curve rather than running straight back. The shape is set entirely by how the scalp is sectioned, and precision matters: a wobbly part throws off the whole rhythm.
Atlanta braider Jazmin Davidson built a reputation on this kind of sculptural work, turning what could be a basic protective style into something that reads as deliberate architecture. The braids themselves stay thick and uniform, but the path they take is what gets noticed. Some braiders add smaller accent braids or a stitch effect between the jumbo rows, which fills the negative space without shrinking the impact of the main curve.
The style works especially well if you want volume that moves horizontally across your field of vision rather than pulling everything backward. It also gives you options at the ends: leave them loose for length, or gather them into a low bun so the scalp pattern stays the focal point. Either way, the parting is what sells it, so a mirror and a rattail comb are non-negotiable tools if you are trying this at home.
36. Thick Pulled Back Cornrows

Thick pulled back cornrows give you the structure of a classic style without the hours in a stylist’s chair. By sizing up each section to roughly double the standard width, you end up with six to eight braids running straight back from the hairline instead of a dozen or more. The larger sections mean your scalp shows between rows, which is part of the look rather than something to hide.
Installation time drops significantly with fewer braids to complete, and the weight distributes more evenly across fewer anchor points. That matters if you’re tender-headed or planning to wear the style through multiple workouts. The tradeoff is less intricate patterning, but the clean geometry reads as intentional and modern.
Keep tension moderate at the hairline. Too tight and the larger sections pull harder on individual follicles; too loose and the braids slip backward within days. Edge control product helps, though I find a light oil on the scalp beforehand prevents the dryness that can make takedown uncomfortable after two weeks of wear.
37. Medium Cornrow Box Braid Hawk

The medium cornrow box braid hawk sits right where edgy and wearable overlap. Cornrows pulled tight along both sides frame a raised center of box braids that land between small and jumbo sizing, which matters more than it sounds. That mid-range scale keeps the style from collapsing under its own weight when your overall length is shorter, letting you get the mohawk silhouette without needing hair past your shoulders.
I have watched enough of these come together to notice where they fail. The side cornrows need real tension; loose ones defeat the whole architecture and the center poufs out sideways. The box braid section should start cleanly at the hairline, not half an inch back where it creates a weak part that shows scalp under movement. Medium sizing also means medium parting grids, roughly two fingers wide, which gives each braid enough autonomy to move without the whole center reading as one solid block.
Color placement gets interesting here. Keeping the cornrows in a single tone and letting the box braids carry a subtle shift, maybe a warm brown into honey at the ends, draws the eye upward without screaming. Maintenance runs about three to four weeks before the sides fuzz enough to blur those crisp lines. Sleep with a satin wrap pulled over the center ridge, not smashed flat, or you will spend twenty minutes each morning reviving the lift.
38. Stitch Cornrow Heart-Shaped Braids

The heart motif in this style only reads clearly if the sectioning is mapped in parts before any braiding starts. A sloppy outline collapses the shape into a vague curve, so spend the extra ten minutes marking the skin-level parts with a tail comb and checking the mirror from multiple angles. Stitch cornrows run neat, even rows that feed directly into the heart’s outline at either the crown or the nape, depending on where you want the eye to land. For a sleek finish, the braids can round up into a low bun that frames the heart without competing with it. Beads threaded onto the ends add a playful accent that works especially well against waist-length braids, though the heart itself does the heavy lifting. If your hair is shorter or finer, the same parting logic applies; the shape just sits smaller against the scalp.
39. Knotless Braids into High Bun

Knotless braids start with your own hair, and extensions feed in gradually rather than anchoring with a tight knot at the root. The tension difference is immediate: you feel weight distributed along the scalp instead of concentrated at the front hairline where traditional braids pull hardest. That matters most when you’re sweeping everything up into a high bun, since the lift and gathering point already add stress to those same fragile edges.
A high bun placement changes how the style wears through the day. Gravity works with you on volume, but any pulling at the nape or temples shows up faster than it would in a low style. The knotless base lets you secure the bun without that tight, throbbing pressure that makes you take braids down early. My preference runs toward wrapping the ponytail base with a section of braids rather than a separate hair tie, which keeps the silhouette cleaner and avoids the bulk that fights against a truly polished round shape.
The tradeoff is time at the chair. Knotless work takes longer because each extension joins the braid progressively rather than in one pre-sectioned bundle. For a high bun specifically, that investment pays off in how long the style stays comfortable enough to actually wear up daily rather than defaulting to a loose style by week two.
40. Intertwined Cornrow Updo

The interweaving in an intertwined cornrow updo happens on paper before it happens on hair. Each cornrow is mapped to travel from a specific point at the hairline toward a planned meeting spot at the crown, where the braids stop short and get pinned across one another in an X or woven basket pattern.
I drew my first map wrong; I assumed the braids had to cross each other while being braided, which tangles the tension and leaves bumps. The actual technique is simpler. You part the hair into quadrants, braid each cornrow to end exactly at the center, then layer the tails: southeast over northwest, northeast tucked under, pinned flat with U-pins that match your hair color.
What sells the look is the scalp showing through in clean geometric shapes. A rat-tail comb and edge control matter more than speed here. Rushing the part lines ruins the symmetry that makes this style read as intentional rather than messy.
For staying power on fine hair, braid with slightly damp strands and a light setting mousse. The updo holds two to three days comfortably, four if you sleep in a satin wrap and refresh the perimeter with a toothbrush and gel.
Frequently Asked Questions
What are some trendy braided hairstyles?
Side braid buns, upside-down French braid buns, Swedish crown braids, loop braids, and waterfall braids all rank among the most wearable options for 2026. The article also covers DIY messy fishtail braids, interwoven three-strand braids, rope braid updos, braided French twists, and ribbon halo braids, with each style broken out by hair length, texture, and how long it takes to build.
How do I maintain my braided hairstyle?
Hairspray at the finish keeps the transition point neat in styles like the French braid ponytail, while a light serum stops the tail from frizzing once the braid ends. Dry shampoo at the roots adds grip that keeps fine hair from slipping, and a smoothing crème helps sections behave if your hair tends to escape. For long-wear events, pinning through the loops rather than over them keeps the structure locked in place.
What occasions are braided hairstyles suitable for?
Braided hairstyles move between settings with small adjustments in tension and accessories. A side braid bun stays polished enough for an office that stretches into dinner, while the same braid with a colored ribbon threaded through reads casual for a weekend. The upside-down French braid bun holds through a full workday, the tucked braided bun reads formal because of its seamless finish, and the waterfall braid photographs like a full updo from the front while keeping length free for festivals. Weddings, meetings, workouts, and errand days all have matches in the list above.